Frame page link

Fork page link

Brake page link

Fender page link

Gallery page link

DIY page link


Homepage link


Rusted VW 1600 engine (Photo 1)

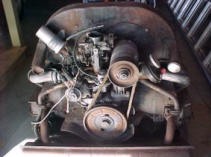
A tired looking VW 1600 engine ready for transformation. First job, strip it and discard the fan belt, S/P leads, fuel hose and other perishable items.

VW engine stripped down (Photo 2)

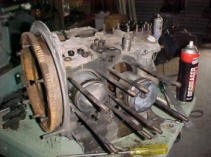
Strip down begins. Note the serious coking on the pistons. Some specialists suggest a light clean, leaving a coating of coke. For me...it's ALL off.
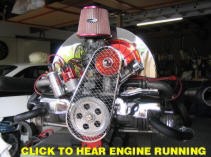
VW engine cylinder (Photo 3)

The cylinders are checked for scouring, excessive wear (int. dia) then cleaned and honed. Consider fitting a new cylinder kit. Details in DIY Guide.

Dirty VW cylinder head (Photo 4)

The heads are in need of some work. Check for cracked valves, bent valve stems and serious wear around the valve seating area. Details in DIY Guide.

Cleaned VW 1600 cylinder head (Photo 5)

The heads after a port & polish. No broken or cracked cooling fins and the valves have been re-seated. Be careful not to break through the exhaust port walls when de-coking.

VW engine valve train (Photo 6)

The valve train before and after refurbishing. Fairly straight forward process. Check for excessive wear points.

VW valve train assembled (Photo 7)

The fully assembled heads are now fitted with care ensuring that all studs and nuts are tensioned to specifications. Details in DIY Guide.

Restored VW 1600 (Photo 8)

Restoring the power plant. Of extreme importance is setting the main shaft end-play. Usually .004" +/- .001   Details in DIY Guide.

VW 1600 engine completed (Photo 9)

Finally all done and dressed up ready to go. (The pink lampshade got tossed) Details in DIY Guide.